Your MAP (Mission Action Plan) lays your goals out on a single timeline so you always know what matters now, next, and on the far horizon. This guide walks through everything — signing in, reading the map, building it, and running your Weekly Debrief.
1 · Getting started
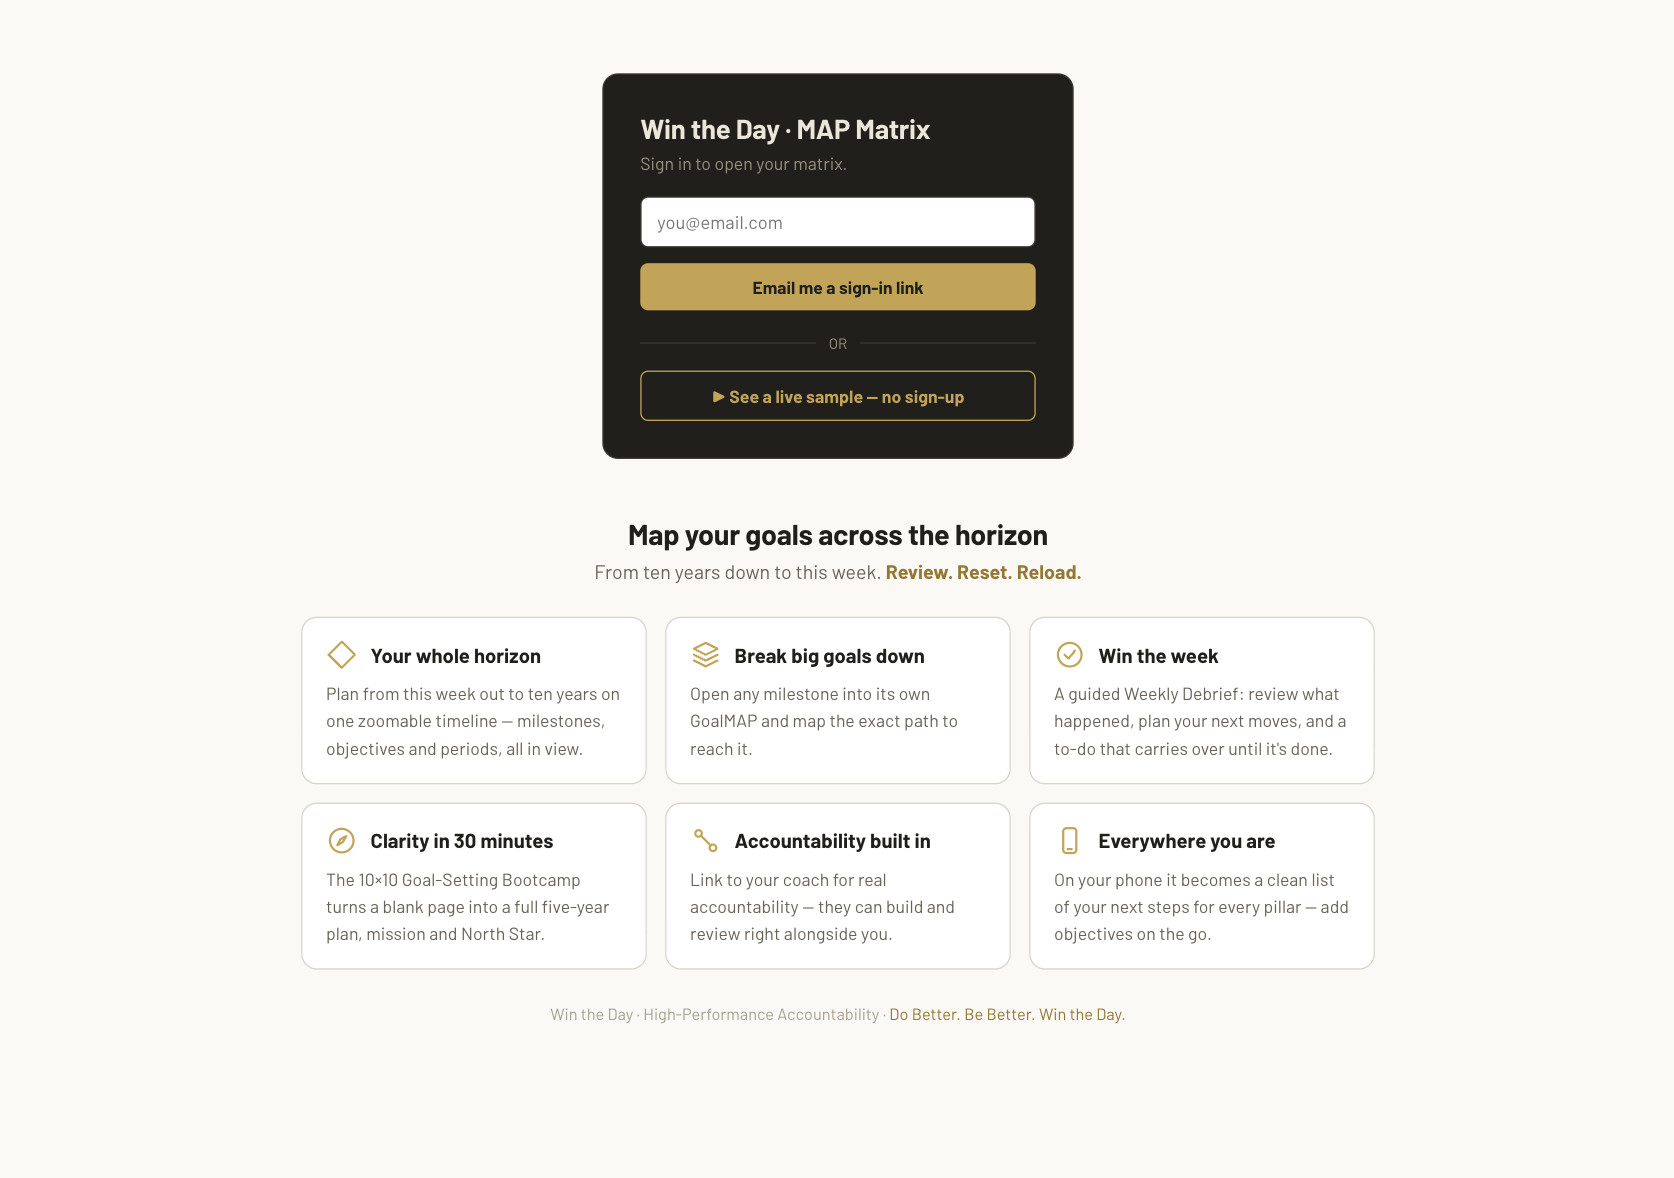
Open your MAP link in any modern browser. You'll see a sign-in screen.
- Type your email and click Email me a sign-in code.
- Open the email and enter the code (or click the sign-in link) — either one brings you straight in. Check your spam / junk / promotions folder if it's not in your inbox within a minute.
- You're in — your MAP loads automatically and saves as you go. There's nothing to "save" manually.
- iPhone / iPad (Safari): tap Share (the box-with-arrow) → scroll down → Add to Home Screen. If there's no such option, you're in another app's built-in browser — open the link in Safari itself first.
- Android (Chrome): tap ⋮ → Add to Home screen (or "Install app").
- Chrome: click the install ⊕ icon at the right of the address bar (or ⋮ → Cast, save & share → Install…).
- Edge: the install ⊕ icon in the address bar, or ⋯ → Apps → Install this site as an app.
- Safari (Mac): File menu → Add to Dock.
- Firefox: doesn't install web apps — just bookmark it (Ctrl/⌘ D) or pin the tab so it's always there.
2 · The big picture
A few words you'll see throughout:
| Term | What it is |
|---|---|
| RoadMAP | Your top-level plan — the whole horizon on one timeline. |
| GoalMAP | A focused nested plan for a single goal (its own mini-timeline). Opens below the RoadMAP. |
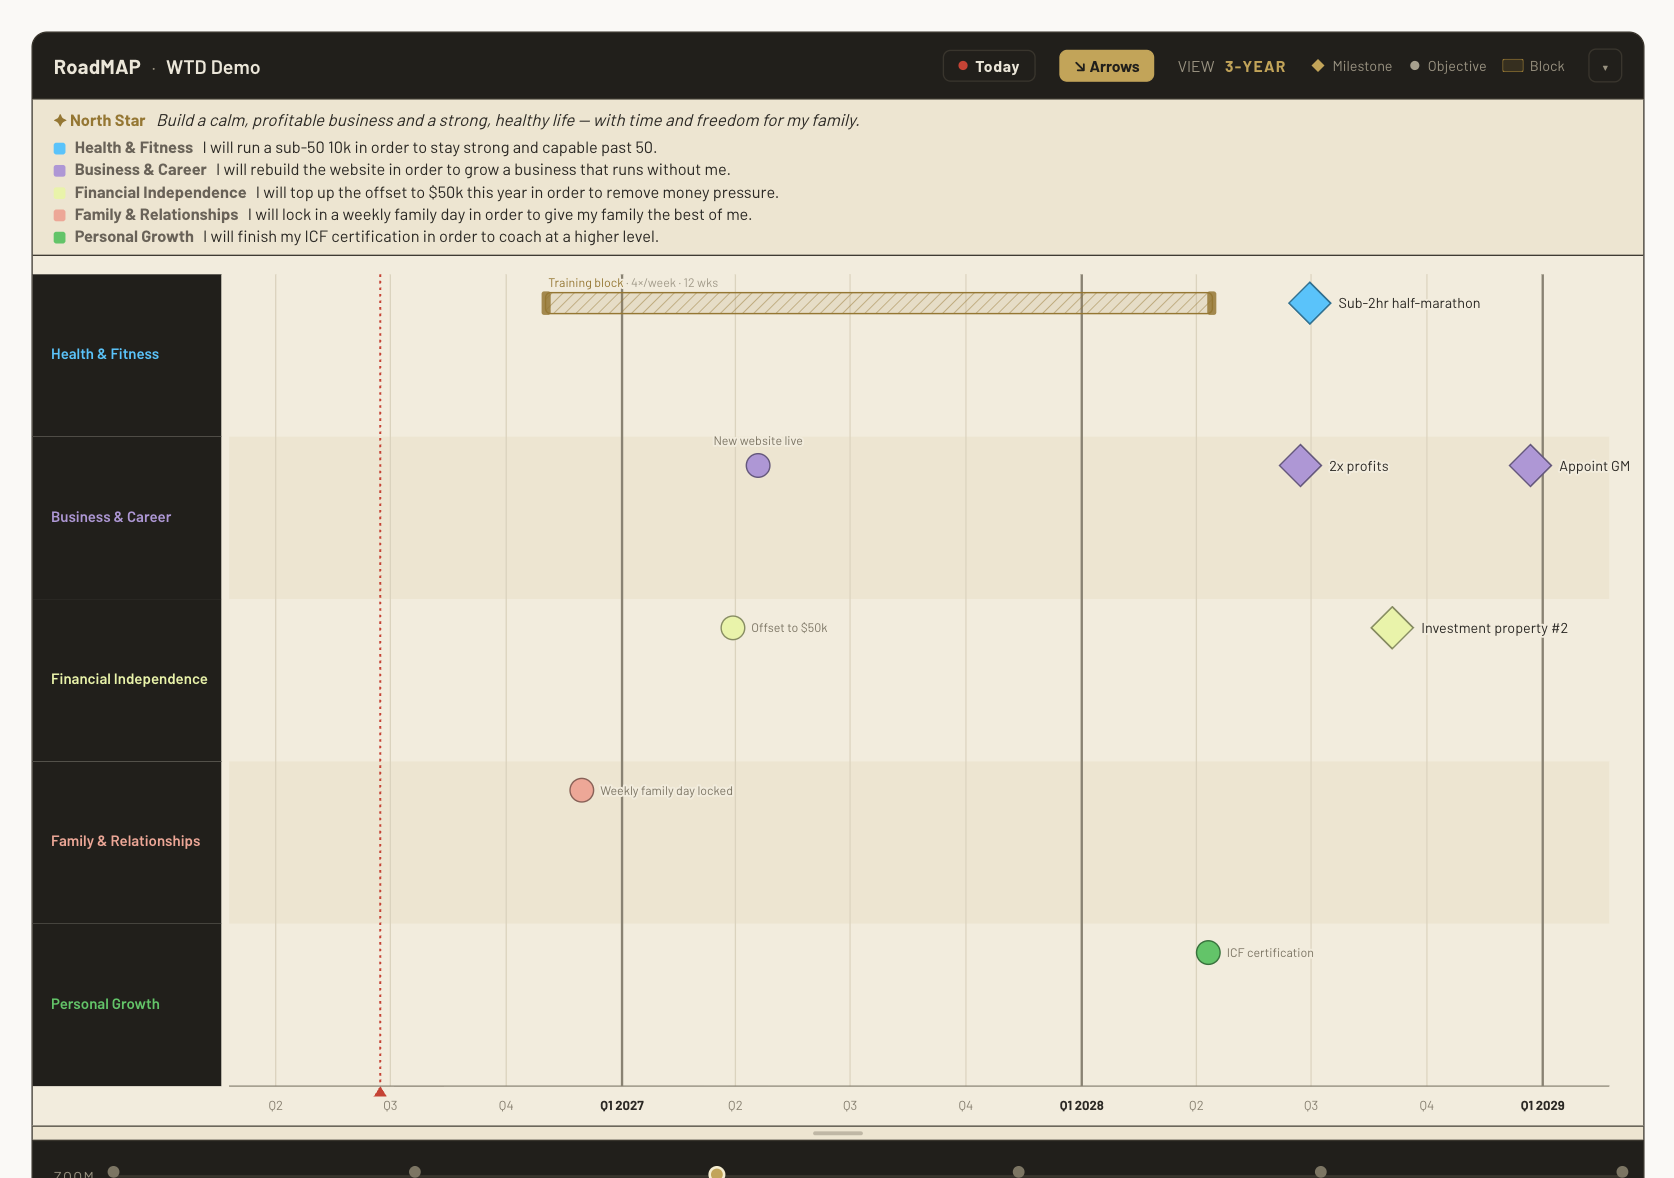
| LOE (Line of Effort) | A horizontal lane — a theme or area of your life/business. Up to 8 per plan, each with its own colour. |
| Objective | A single point in time on a lane — a goal with a date. Shows as a goal (diamond) at wider horizons and a dot as you narrow in. Same item, different horizon. |
| Block | A period (a span of time) rather than a point — e.g. "Training 4× per week" or a 3-month sabbatical. |
The five standard pillar colours:
3 · Reading the timeline
The horizon
The timeline opens on the Qtr view (your current quarter, with today near the left) and runs down to this week and out to ten years. Scroll to adjust your horizon, and drag left/right to move along the horizon. As you shift horizons, the axis automatically shifts between tiers — 10-year, 5-year, 3-year, 1-year, Qtr and week — and the bottom axis always shows the quarters you coach in. (Further-out goals stay reachable by dragging right.)
The horizon slider at the bottom of each display is the quick way to set the horizon: drag the gold handle (or click anywhere on the track) between 10Y · 5Y · 3Y · 1Y · Qtr · MTH · Week and it snaps to that view. The MTH stop gives you a rolling 4-week window — closer than the quarter but without going all the way to week-by-week. The filled part of the track shows how far out you're looking. Each display reopens right where you left it — your horizon and position are remembered, so you don't reset to the quarter every time.
In the Qtr and Week views the axis also numbers the weeks of the quarter (W1–W13) alongside the dates, so you always know which week of the quarter you're in.
The same objective changes shape with the horizon: a goal (diamond) far out becomes a dot as you get closer. You never set this — it's automatic.

The toolbar (top of each display)
- Today — jumps so today sits near the left with a little breathing room, and drops a red marker on today's date.
- CY | FY — switch a plan between calendar year and financial year (Australian FY, Jul–Jun). Quarters stay in the same place; only the labels change (e.g. Jul–Sep 2026 = Q3 2026 in CY, Q1 FY27 in FY).
- VIEW — shows the current horizon (set the horizon with the slider at the bottom of the display).
- ↘ Arrows — dependency arrows are shown by default; hide them app-wide in ⚙️ Settings → Timeline.
- ↗ Share — create a read-only link to that RoadMAP or GoalMAP so a team member can view it (see the callout below).

4 · Building your RoadMAP
There are three ways in, plus adding objectives by hand — all in the Build ▾ menu at the top right. They do different jobs, so it's worth knowing which one you want:
- ▶ 10×10 Bootcamp — breadth. Goals across every pillar, fast.
- ✳ Original GoalMAP — depth. One goal, war-gamed properly (about 25 minutes).
- 🛢 Build your Drum Line — the path. Backcast one goal into dated signposts.
Most people run the Bootcamp first, pick the three-to-five goals that actually matter, then go deep on those.
🛢 Build your Drum Line — the fastest way in
Open Build ▾ → 🛢 Build your Drum Line, and pick any goal, with any date — "Dec 2027", "Q3 2026" or just "2028" all work. The wizard reads the horizon ("about 2 years out") and then walks you through the drums — achievable markers — one question at a time, halving the distance: roughly midway first, then halve again, and again, converging on today. Skip any you're not sure of; add extra markers in any gap afterwards. It finishes on the very next physical action (small enough for this week), optionally sets it as today's Main Effort, and asks if you'd like to enter another goal. Baby steps by design — you never face more than one decision at a time. (Prefer AI suggestions? There's a ✨ hand-off to Break it down right inside the drums step.)
✳ The Original GoalMAP — the deep dive on one goal ✳ Original GoalMAP
Named for the workbook it comes from — the original GoalMAP process, from the PDF editions. A quick word on names: the app is the Matrix; your RoadMAP is the holistic timeline across your pillars; a GoalMAP is the board for one specific goal. This is the thinking that fills one in.
Open Build ▾ → ✳ Original GoalMAP, or open any goal on your timeline and choose ✳ Original GoalMAP from its card. It walks the seven steps of the GoalMAP Workbook, one question per screen:
- The goal — attach to one you already have, or write a new one here (with a metric and a deadline).
- Who do you need to become? The habits and systems don't hold if your identity doesn't match the goal. Stuck? Borrow the traits of someone who's already done it.
- Likely obstacles. The part most planning avoids. If you've carried this goal a while without hitting it, the reason belongs on this list — and + objective turns beating an obstacle into a dated objective leading to the goal.
- What it requires — 4a the skills that clear bottlenecks, 4b the people who give you traction, 4c the habits that hold when motivation fades. + track turns a habit into a Habit Tracker row on your timeline.
- Your mission — “I will achieve X by Y in order to Z.” The “in order to” is the nesting connector to something bigger. (This one belongs to the goal — your pillar's mission statement, the one covering every goal in that lane, stays on the lane heading.)
- Your Lines of Effort. Name 2–5 systems that have to move, and plot a milestone per cell. This is the step that becomes your Matrix — see below.
- Move now. The smallest action that advances the mission, created as an objective dated this week — and optionally today's Main Effort.
Nothing is compulsory. Skip anything you like: the review at the end tells you what's still open, and reopening that goal's Original GoalMAP picks up exactly where you stopped. A half-finished one beats an abandoned one.
The 10×10 Bootcamp ▶ 10×10 Bootcamp
A guided wizard that coaches you through four quick rounds (plus two bonus rounds) in about 20–30 minutes and turns your answers into objectives on the RoadMAP. Best when you're starting from a blank page and want to think it through — each round has a built-in countdown timer (hit Start, with Pause/Reset and a gentle chime when time's up), plus its instructions and examples as you go. Your progress is auto-saved as a draft and it won't close if you click outside it — step away and reopen it any time, right where you left off (close it with the ×). New to the method? Read the full 10×10 Goal-Setting Bootcamp guide first.
The wizard also captures the two bonus rounds — a mission statement for each pillar ("I will achieve X by Z in order to Y") and your North Star. So you don't have to remember what you typed rounds ago, both bonus steps show the goals you entered for each pillar — and on the mission step you can hit ✨ Draft one from these goals to pre-fill a mission from them, then tweak the wording. These appear in a focus banner at the top of your RoadMAP (and the phone view): your ✦ North Star on top, then a Pillar Mission Statements heading with a one-line mission per pillar — so your "why" and each pillar's "how" stay in sight. Edit the North Star by clicking it; edit a pillar mission by clicking its lane heading.


Rapid entry ⊕ Rapid entry
A fast table for when you already know your goals. Choose which plan to add to (the RoadMAP or any open GoalMAP), type a title and a date for each row, and add them all at once. The tier (how far out it sits) is worked out from the date automatically. Tick Start on a row to drop it in as a start state — a square marking where a line of effort begins, rather than a diamond/dot to aim at.
2027) → 31 Dec; a quarter (Q3 2026) → the last day of that quarter; a month (Mar 2027) → the last day of the month; a full date is used as-is. FY tokens like FY27 work too.
✨ Break it down — let the AI suggest the steps ✨ Break it down
Know the goal but stuck on what to do this quarter? Open Build ▾ → ✨ Break it down (AI), pick one of your big goals, and the AI proposes the signposts between here and there — quarterly objectives dated back from the goal, monthly markers for the nearest quarter, and a first Main Effort for this week. Each suggestion is a card you can tick, edit or drop — you pick the ones that are yours. What you keep lands on your timeline, dated and linked to the goal. It takes 15–30 seconds to think (a tracker shows it working).
5 · Adding & editing objectives
Double-click any empty spot on a lane to add an objective right there — the pillar comes from the lane you clicked, the date from where along the timeline you clicked, and the horizon from your current view. To edit one you already have, single-click the objective to open its editor. From the popover you can:
- Rename it and pick its date right in the editor — the tier below follows the date automatically, so the two never disagree. (Dragging the marker along the timeline works too.)
- Change its tier (how far out it sits) and its LOE / pillar (which lane & colour).
- Add a Note — longer context that stays attached to the objective. On desktop, hover the objective on the timeline to read its full title, date and note without opening it.
- ✓ Mark complete — done with it? Tick it off and the objective gets a green ring + tick on the timeline (and shows as done in 🦾 Execute). Great for ticking off the week's Main & Supporting Efforts as you finish them — your coach can do this on a check-in, or you can as you go. Click again to undo.
- Leads to — say what this objective drives toward. It takes the next objective along as readily as the goal itself, and lists both, dated after it and in the same pillar row. Picking the thing immediately ahead is usually easier to answer than naming the far horizon — and truer, because a line of sight is a chain: drum → drum → goal. Either way it rolls up; the goal is whatever sits at the end of the chain, so the objective still shows as a step on that goal’s line in 🦾 Execute and on the Line of Sight instead of standing on its own. This is the same link the Drum Line writes when you lay a drum, so objectives created in the Drum Line are linked already — this is for the ones you typed on the timeline or got from the Bootcamp. Same row only, deliberately: the whole board would be an unreadable list otherwise. To point an objective at a goal in a different pillar, use 🔗 Link existing on the Line of Sight.
Can't find something in the list? The picker only offers what's still ahead of you: same pillar, dated after this objective, and not already ticked complete. That's deliberate — a line of sight points forward, and it keeps the list to a handful instead of every item you've ever finished. So a goal or objective you've already completed won't appear. If you're filling in history after the fact and you do want the link, untick the completed one (✓ Completed — click to undo), pick it in Leads to, then tick it complete again — the chain keeps the link, and a passed drum still shows as ✓ Drum passed on the Line of Sight. - 🏁 The finish line. When a run of objectives — or an ongoing effort (a habit block pointing at it) — leads to a goal and nothing leads on from it, that goal wears a chequered edge on the timeline and a 🏁 on the Line of Sight — it's where the line stops. The defaults come from your links: the end of a run is on; anything unlinked, mid-chain, or leading somewhere bigger is off. Deliberately not decided by horizon: "City to Bay" and "Complete the MDS" can both be year-out goals, but one is a marker you pass on the way to the other. And it's yours to override per objective: open it → ▸ More options → 🏁 Finish line to mark a goal early (before you've laid its path) or unmark one the links would flag — the row says whether the mark is auto (from its links) or set by you, and flipping back to what the links say hands it back to auto.
- Mark as start state — renders the objective as a square, handy for documenting where a line of effort begins. A start state can serve a goal too: it then shows on the Line of Sight as the baseline you set out from — never as a signpost to pass.
- Convert to block → — turn a point into a period (a 4-week span you can then drag either end to resize).
- ⧉ Duplicate → next week / quarter / year — drops a fresh copy one period later, sized to the objective (a weekly one jumps a week, a quarterly one a quarter, a yearly one a year). Handy for recurring goals and check-ins. The copy starts clean — not marked complete, no slip flag.
- Arrows draw the chain. Linked objectives get a faint dotted arrow on the timeline, so the link stops being invisible metadata. They run nose-to-tail: objectives heading for the same thing are joined in date order, and only the last one points at the goal. That’s the drum line — you sight the next drum, not the horizon — and it keeps a busy pillar readable instead of firing six lines at one diamond. Two pillars driving the same goal stay two separate runs. Baselines and ongoing efforts always point straight at their anchor, because you don’t pass a starting point or a habit. It’s all derived, so there’s nothing to keep tidy: change a link and the arrows re-thread themselves. Getting busy? ⇢ Arrows in the timeline bar, next to CY/FY, turns them all off.
- Add a dependency to another objective (see below), Set horizon here, Open as GoalMAP, move it between your RoadMAP and a GoalMAP (see GoalMAPs), or Delete.
Move it freely. Drag an objective left/right to change its date — including back before today, so a start-state marker can sit in the recent past — and up/down into one of three stacked slots in its lane, so objectives on the same date don't sit on top of each other. Double-click empty lane space and the new objective lands in the slot you clicked.

6 · Period blocks
Blocks are spans rather than points — habits, phases, or commitments that are true across a stretch of time (e.g. "Training 4× per week", a 3-month sabbatical). Click a block to rename it, change its start/end, or delete it. Blocks can carry dependencies too, and you can Convert to goal → to turn a block back into a single objective at its start date, or ⧉ Duplicate → next period to drop a copy immediately after — sized to the block's length, so a week-long block lands the next week and a quarter-long one the next quarter.
Each block takes the colour of its pillar / lane, so it reads at a glance as part of that line of effort. An intensity block (a push) shows as a solid tint; a rest / recovery block shows as a lighter, dashed bar.
Move blocks freely. Drag a block left/right to shift it in time, and now up/down to snap it into one of the three lane slots — just like objectives — so blocks and objectives in the same lane don't overlap.

7 · Dependencies
Dependencies draw an arrow from one objective (or block) to another — "this has to happen before that".
- Open the editor on the source objective.
- Click ──▶ Solid or ┄┄▶ Dotted.
- Then click the target objective. The arrow is drawn.
Use solid for hard dependencies and dotted for softer links. If one end scrolls off-screen, the arrow stubs neatly to the edge so you can still see the connection. To remove one, click the arrow (or the objective) and delete it.

8 · GoalMAPs
Any goal can become its own detailed plan. Open a goal's editor and choose Open as GoalMAP →. A new GoalMAP display opens below the RoadMAP (it never pushes the RoadMAP aside). The option only appears on goals — the nearer-term objectives are the steps within a plan, so they don't spawn their own.
- Spot the drill-downs: any objective that has a GoalMAP attached gets a gold outline (a gold diamond around a goal). It stays visible at every horizon level, so you never lose sight of a goal that has a plan behind it.
- Give the goal a mission: each GoalMAP has its own ✦ Mission banner up top — click it to add the goal's mission statement (just like the North Star, but for that goal). It shows on the phone too.
- Rename a GoalMAP by clicking its title in the header (or the ✎ beside it) — type the new name and press Enter. The ↳ from … trail keeps showing the goal it grew from.
- Collapse / expand a GoalMAP with the chevron, and hide it with the × in its top-right (it stays active — just off the screen).
- Archive a finished GoalMAP with the Archive button in its top-right. Unlike hiding, this retires it and frees a focus slot so you can start a new one — its data is kept, it just steps off the board.
- Look back at an archived GoalMAP any time from Help ▾ → 🗄 Archived GoalMAPs. Pick one from the list and it opens read-only (marked ARCHIVED · READ-ONLY) below your board — so you can review a finished effort without reactivating it or using up one of your three focus slots. Close it with the × when you're done.
- Drag the bottom edge of a display to make it taller — handy when a lane has lots of objectives.
- A GoalMAP starts with 5 lanes; add more with + LOE (up to 8). Click a lane's label to open its editor, where you can rename it, add a mission, set its focus (ME / SE 1 / SE 2), reorder it with ▲ Move up / ▼ Move down, or Delete lane. Deleting a lane also removes everything in it (its objectives, blocks and dependency arrows), so you'll get a confirm first — and you can't delete the last remaining lane. Colours stay from the standard list.
- On a GoalMAP, ⬆ To RoadMAP puts it on the high-level view (in the lane of the goal this GoalMAP details) — good for a key goal that deserves top-level visibility.
- On the RoadMAP, ⬇ Into a GoalMAP sends it down into a GoalMAP you pick — good for a RoadMAP item you want to flesh out in detail.

9 · The Drum Line
A goal on the map tells you where you're going. The Drum Line works out what to do about it on Monday. Open it from Build ▾ → 🎯 Line of Sight.
Drums are objectives
Nothing new gets created behind your back. Every drum you lay here is an objective on your timeline — same item, same date, same pillar. "Drum" is simply what we call the next one in sight. Lay a drum on the rail and it appears on your RoadMAP; move it on the timeline and the rail follows.
Anchor on a goal
The screen opens on one goal at a time — the far side of the desert. At the top, Your goals · the path to each lists every goal you have with its objectives cascading under it, so you can see at a glance which ones have a path and which are still just a date. Click any goal to focus it; the working rail below rebuilds around it, and the app remembers your choice next time.
Only goals a quarter out or further can be anchored — anything nearer is a step, not a destination. If nothing's eligible yet, the screen says so and points you at the 10×10 Bootcamp, which builds a full set in about thirty minutes.
Reading the rail
The rail runs top to bottom, farthest first, so you read it the way you'd drive it: the goal at the top, today at the bottom. Each card is one of six things.
- 🏆 The goal — with its date, its plan, and a running N/M drums passed tally.
- 🛢 → Next drum — highlighted in gold, because it's the only one that matters this week. This is the card with the buttons on it (see below).
- 🛢 Objective — a drum still ahead of you. Once you tick it off it becomes ✓ Objective passed, struck through and faded, and the tally moves.
- ▣ Where this started — a start state you've pointed at this goal. It sits at the near end as the baseline you set out from, and it's deliberately kept out of the tally: it isn't a signpost to pass, it's where you were when you began.
- 🔁 Ongoing effort — a period block (a habit, four sessions a week) pointing at the goal, shown at the date it ends. It's how you get there, kept up rather than passed, so it's also outside the tally and can never become the next drum.
- + No objective here yet — an empty cadence slot, dashed rather than solid. That's the app telling you there's a gap in the line.
Laying the drums
- + Add a drum on any empty slot — name what's true by then, and it lands on your timeline at that date, in the goal's pillar, already linked.
- 🔗 Looks related — link it? Where you already have an objective in the same pillar that isn't tied to any goal, the rail offers it rather than making you type it twice. 🔗 Link to this goal adopts it (and quietly fixes its horizon if the date and the tier disagree); ✕ Not related waves it off for this goal only, so it can still be offered against another.
- 🔗 Link existing on a goal in the cascade points an objective you already have at it — including one from a different pillar, which the timeline's own Leads to picker won't do.
- ✨ Let the AI suggest the drums — hand it the goal and it proposes the sign-posts for you to accept, edit or ignore. This one is a premium feature.
Working the rail
- Make this week's Main Effort — one tap on the next drum and it becomes the Main Effort in your Weekly Debrief, or as Supporting for a supporting slot. This writes a real link between the effort and the objective, so the connection survives you rewording either one. Once it's set, the card says ✓ This week's Main Effort instead.
- ✎ Rename in place — click the pencil beside any title on the rail and edit it where you're standing. Enter or clicking away saves it, Escape backs out, and an empty box cancels rather than wiping the name. Works on the goal, the drums, the baseline and ongoing efforts.
- Click any date to pin it — race day is race day. Set the fixed date first and lay the rest of the line around it.
- ↑ ↓ Move earlier / later — swap a drum with its neighbour when the order is wrong.
- ✕ unlink — take a drum off this goal's line. The objective stays on your timeline; it just stops being part of this path.
🏁 The finish line
When a run of drums leads to a goal and nothing leads on from it, that goal is the end of the line — it wears a chequered edge on the timeline and a 🏁 on the rail. The app works this out from your links rather than from how far away something is, which matters: "City to Bay" and "complete the MDS" can both be a year out, but one is a marker you pass on the way to the other. An ongoing effort counts too, so a goal fed only by a habit still earns its finish line.
It's yours to override. Open the objective → ▸ More options → 🏁 Finish line to mark a goal before you've laid its path, or unmark one the links would flag. The row tells you whether the mark is auto or set by you, and putting it back to what the links say hands it to auto again.
Closing the chain
At the bottom of the rail, under This week, sits ☀️ Today's next step — the first priority still outstanding from your Book-end. That's the whole line in one screen: the goal, the drums between here and there, the one you're driving at this week, and the single thing to do about it today. When every step you set for today is done, it says so.

10 · The Weekly Debrief
Your weekly reset. Open it from Review ▾ → ✓ Weekly Debrief. It has three parts — Review, Plan, and a Brain dump — and it can email you a copy when you're done.
Review — what happened
- Note to self (optional) — a headline intention for the week (e.g. "consistency, not intensity"). It shows at the top of the copy the debrief emails you.
- What was supposed to happen — your Main Effort and two Supporting Efforts for the week just gone, each with a ✓ or ✕ you tick yourself. That's the score; you don't have to write it out.
- How you expected it to play out — a line or two in your own words. The efforts say what you committed to; this says what you thought the week would look like.
- What you did — beside your plan, everything you actually ticked off all week, gathered for you: grouped by day, with routines collapsed to one line and a count. It scrolls, because a real week runs closer to eighteen items than three.
- What actually happened — facts, no spin. This one starts empty on purpose — the ✓/✕ has already recorded the score, so this is for the story behind it.
- Maintain / Improve / Fix — what worked, what didn't, and what you'll do about it.
- Did you win? — a simple yes/no.
- Scores (optional) — expand this for quick ratings (Motivation, Capacity %, Health/Sleep/Fitness, Routine, Productivity, Impact, plus four pillar scores — Family, Business, Financial, Growth). Leave it collapsed to skip.

Plan — next week
Set next week's Main Effort and two Supporting Efforts. For each one you can either:
- Pull from upcoming — pick an objective that's due in the next two weeks (from your RoadMAP or any GoalMAP), or
- Type your own — then optionally hit + Make it an objective to put it on your map: give it a short name, choose the plan & lane and a date, and your longer wording is saved as the objective's note.

Brain dump — anything else on your mind
A quick capture list right inside the debrief — the same items as your full 🧠 Brain Dump (see below), carried over week to week until you tick them off. Add anything on your mind as it comes up. For any open item you can:
- Check it off when done (it stops carrying over), or delete it with ×.
- Promote → it straight into next week's Main Effort or a Supporting Effort.
- + Objective — add it to your map as an objective, just like in the Plan section.
- ① Dump — get every loose task and open loop out of your head. One line per thought: it's unlimited; add a Day and rough Time if it helps, and hit ★ To-do to send an item to your 🦾 Execute shortlist (capped at five open items on purpose — the Brain Dump is the holding list behind it).
- 📝 Notes — the detail you'll need when you do it. Tap 📝 on any line to attach an address, an order number, who to ask. The icon stays lit so you can see which lines carry detail, and the note shows under the line without opening it. It travels: into ② Prioritise (often it's what decides where the thing goes), onto your ★ to-do shortlist where it shows in 🦾 Execute, and into an objective's note if you put it on the timeline. One exception, and the app says so: a daily or weekly effort is a single line of text with nowhere to keep a note — send it to the shortlist or make it an objective instead.
- ② Prioritise — process the inbox one item at a time and file each where it belongs: ☀️ Today's effort, 📅 This week's effort, a 🎯 Objective on the timeline (pick a lane & date), the ⭐ To-do shortlist, 🗂 Keep for later, or 🗑 Delete. It ends with a tally of where everything went — like the "process your inbox" step of a weekly review, but for your head.

Save & email
The Email to field defaults to your address. Click Save & email to store the debrief and send yourself a tidy copy (review, scores, next week's plan, and what's on your mind). Or click ⤓ Save / print a copy to open the branded write-up in a new tab to print or Save as PDF — handy if your inbox is slow to deliver, or you just want a copy on hand (no email needed). Past debriefs are listed at the top so you can look back at any week.
It won't be lost. As you fill in a debrief it's auto-saved on your device — if you get interrupted or close the app before saving, reopening the Weekly Debrief brings back exactly what you'd typed.
Between debriefs: 🦾 Execute
For a quick daily glance — without opening the full debrief — click 🦾 Execute in the top bar. At the top, a Momentum band shows how the wins are stacking up: this week's objectives done, a completion % on each active GoalMAP, your Book-end streak 🔥 (consecutive days you actually did a book-end — answered the win question, wrote a review field, or ticked a priority off; a day the app merely carried yesterday's unfinished priorities into doesn't count), and — once you've been answering "Did you win the day?" — your 🏆 win-rate — the share of the days you answered “Did you win?” where you said yes, so unanswered days count neither way — and your ⚡ best win streak, the longest run of consecutive days you answered yes. That last one is a different measure from the 🔥 streak beside it, and will sit lower unless you answer the win question daily. The band follows the switch below it: on Weekly the same three numbers become the week's — a week-by-week streak counting back Monday by Monday, the share of weeks you won, and your best run of winning weeks — so the numbers under a weekly check-in are weekly ones. Below it that Daily | Weekly switch shows either today's Main + Supporting Efforts (from last night's Book-end — tick them off here too, since they don't live on the timeline) or this week's efforts from your latest debrief; your Habit tracker (any active period block with a weekly cadence — tick + Done each session, and the weekly pips fill); then the objectives coming up in the next two weeks, each with how many days away it is — anything you've marked complete shows struck-through with a green tick. If an upcoming objective matches one of your efforts, it's tagged Main / Support. Then your to-do list — your focus shortlist, capped at five open items on purpose. Add one straight in, tick it off, or delete it; anything completed is listed below to clear out. Got more than five things on your mind? That's what the 🧠 Brain Dump (Capture ▾) is for — capture it all there and promote your next five targets up to this list. It's the same list as your phone, so items sync across. (On a phone, Execute becomes a full daily screen — see below.)

Daily Book-ends ☀🌙
The daily counterpart to the Weekly Debrief. Open it from Review ▾ → ☀ Daily Book-ends to top-and-tail your day:
- 🌙 Tonight — review today (the same what happened / Maintain / Improve / Fix / did you win as the weekly), then set tomorrow's top 3 priorities and tick ⏱ Time blocked once you've scheduled them. The book-end does the bookkeeping for you: anything you didn't finish carries over into tomorrow's priorities, and if you didn't tick your main priority, "Did you win today?" starts on No — both editable, so override anything that isn't right. "What actually happened" stays empty, exactly as in the Weekly Debrief: the tick beside each priority is the score, and the box is for the story. (It used to arrive pre-filled with ✓ Completed… / ✗ Did not complete…, which was written once and never refreshed — so a day whose priorities you'd since ticked off still read "did not complete" for all three.)
- 📅 Book-ending the day of — the date picker at the top of the evening section. It defaults to today, but change it if you’re writing up after midnight or filling in a day you missed, so the entry files against the right day. When it isn’t today the app spells out which dates it’s writing to, and offers ↩ Back to today.
- Pull from your plan — under tomorrow’s priorities, tap a chip to fill the next slot from this week’s efforts, an objective due in the next week, or your to-do shortlist — so Priority 1 comes from your plan rather than memory. Pulling also records the link, so ticking that step can complete the objective on your timeline.
- ☀ Morning — open it and today's priorities (set last night) are waiting at the top; tick each off as you go. If a priority matches an objective on your timeline, ticking it here also marks that objective complete — one tick, both places.
Like the debriefs, an in-progress book-end is auto-saved on your device — nip out to your calendar to time-block and come back, and it's still there. (Even the free /bookends page keeps a local draft while you're on it.)
Saving works exactly like the debrief: Save stores it and nothing else, Save & email also sends a copy, and ⤓ Save / print a copy opens the write-up for print / Save-as-PDF without email. Tip: map.wintheday.com.au/?app=bookends opens straight into book-ends — handy as a phone home-screen shortcut for the morning check.
11 · The Quarterly Review (AAR)
The big-picture debrief — the same five After-Action-Review questions as the Weekly Debrief, but run pillar by pillar across all five, once a quarter. Open it from Review ▾ → ◷ Quarterly Review. It's built on the military AAR method (the same one behind the Comeback Protocol): for each pillar you answer What was supposed to happen · What actually happened · Sustain · Improve · Fix, then name a Strategic Priority and an Immediate Action.
It comes pre-filled. It reviews the quarter that just finished (open it in the first week or two of the new quarter — or in the final fortnight of the current one, and it'll review this quarter instead). Just like the daily and weekly reviews, each pillar is seeded from that quarter's objectives on your timeline: "What was supposed to happen" lists everything that was due, "What actually happened" flags anything that got pushed or missed, and Sustain lists what you completed. The last two questions are left blank for you — that's the thinking only you can do. Everything's editable. Each Fix you write becomes a 90-day objective on that pillar, so the review ends with your plan already updated. The final step also shows a "where your GoalMAPs landed" recap — each of this quarter's active GoalMAPs with how much of it you completed — so you close the review with a clear read on your big efforts, not just the pillar answers.
Save & email. At the end you can Save review, ✉ Save & email a full copy, or ⤓ Print it to save as a PDF. Running it with a client? Everything saves to their account (you're acting as them), you can pop their email in the copy field to send the write-up straight to them, and a copy is BCC'd to you.
Pick up where you left off. Saved reviews appear on the opening screen under "Or reopen a past review" — click one to view it or keep filling it in, even a half-finished one. Saving updates that same review rather than creating a new one. And as you work, the review is auto-saved on your device — if you get interrupted or the app closes before you hit Save, reopening the review restores exactly what you'd typed. (If a save ever fails, it tells you and keeps your answers rather than closing.)
📚 Previous reviews
Every saved review is kept. Open Review ▾ → 📚 Previous reviews for a single, newest-first list of all your Quarterly AARs and Weekly Reviews together. Click any row to expand it and read the full write-up. It's the fastest way to spot a recurring blocker — the same Fix showing up quarter after quarter, or a Supporting Effort that never quite lands. Your reviews are your own; a coach acting as you sees the same history.
📊 Progress — your scoreboard
Open Review ▾ → 📊 Progress for a read-only dashboard of how you're tracking, built from your book-ends and debriefs:
- Win-rate & streaks — the share of weeks you won, your current and best daily win streak, and how many of the last 12 weeks you debriefed (consistency).
- Wins heatmap — a ten-week calendar of your daily wins: ■ won · ■ missed · ■ logged (no yes/no) · blank for days with no book-end.
- Habit tracker — weekly consistency — for each habit (a period block with a weekly cadence) ("Gym 3× per week"), a strip of its weeks: ■ target hit · ■ partial · this week dashed, with a "hit 8/8 weeks" tally. So you can see at a glance whether the habit is holding.
- Score trends — a mini chart per Weekly-Debrief metric (Motivation, Capacity, Health, Routine, Productivity, Impact) over your last 12 debriefs, with the latest value and average.
- Badges — goals you earn as you show up (first debrief, a 4-week streak, a 7-day win streak, 70% win-rate, a 4-week habit run, and more).
12 · On your phone
The timeline is built for a big screen, so on a phone the app opens straight to your 🦾 Execute screen — today's focus — so the first thing you see is what to do now, not the whole timeline. From there, 🗺 View plan → opens the full list view (your RoadMAP, then each GoalMAP). When the phone view first opens, a quick pop-up reminds you and can email you the link to open the full app on a computer.
- 🦾 Execute → Daily — today's Main + Supporting Efforts, your to-do list, what's coming up.
- 🦾 Execute → Weekly — the efforts from your latest Weekly Debrief, and your goals with their next drums.
- 📋 Review → ☀ Daily — tonight's Book-end: review today, set tomorrow's priorities.
- 🧠 Dump — the Brain Dump: ① get it out of your head, ② Prioritise files each line. No cadence — capture doesn't have one.
- 📋 Review → ✓ Weekly — the full Weekly Debrief, in the phone rather than in a pop-up.
The rituals used to open as pop-ups from a list at the bottom of the Execute screen. They're now a destination, because that's how they're actually used: the daily book-end is mostly done on a phone, and the weekly debrief often is. Your last-used Review cadence is remembered on that device — run your debrief on the phone every Sunday and it opens on Weekly next time. Execute stays the landing screen either way.
🦾 Execute — your daily screen (where the phone lands)
This is the screen you run your day from. It shows:
- Today's / This week's focus — a Daily | Weekly switch. Daily shows your Main + 2 Supporting Efforts for today (the priorities you set the night before in your Book-end); Weekly shows the efforts from your latest Weekly Debrief. Tick each off as you complete it (green check + strike-through). You can also type an effort straight in — handy on the Daily tab if the evening got away from you and you didn't set priorities — or clear one with the ×. Morning carry-over: if yesterday's priorities weren't all ticked, the incomplete ones arrive pre-filled in today's Daily slots automatically — the day starts where yesterday left off, no re-typing.
- 🧠 The Brain Dump is a tab, not a menu item. On a phone the top bar reads 🦾 Execute 🧠 Brain Dump 📋 Review — capture sits at the same level as doing and reviewing, because it's the most phone-native act in the app: you do it in a queue, in the car park, at 11pm. Both stages come with it: ① Dump to empty your head, ② Prioritise to file each line to today's effort, this week's effort, an objective, the ★ shortlist, later, or the bin. The sheet is deliberately down to the task and a day — Time, Bus/Pers and Timeblocked came off the paper Hour-of-Power sheet and nothing in the app ever read them.
- ➕ A 6th to-do goes to the Brain Dump, not nowhere. The shortlist caps at five on purpose — it's the gate between everything you could do and what you will. Adding a sixth used to do nothing at all. Now it's captured in the Dump and says so. The cap gates the shortlist, not your head.
- 🎯 Your weekly Main Effort goes ON your MAP, automatically. Name it — here or in the Weekly Debrief — and it lands on your timeline dated that Sunday, so you see it sitting in the week rather than only in a text box. Because it's a week-tier item, it shows at the Week horizon, shrinks to a dot at Month, and is hidden from Quarter out — a year of weekly efforts never clutters your planning view. Three things worth knowing: type the name of an objective you already have and it links to that one instead of duplicating it; reword your effort and the item follows (one item per week, not one per edit) — unless it's an objective you linked, whose name is left alone; and a quiet undo sits underneath, which stays undone. Where an effort has no goal behind it, a one-tap "What's this for?" picker finishes the line — the one thing the app can't work out for you.
- 🎯 Your line of sight, under the efforts. One line showing the whole nest: ☀ today's Main → 🎯 this week's Main → 🛢 the objective → 🏆 the goal. It reads in both cadences — in Daily it starts with today's Main, in Weekly with the week's — and it walks the whole chain, so the 🏆 at the end is the real goal, not the next objective along. The rule it makes visible: this week's Main Effort is the very next step for an objective; today's Main is the very next step for this week's. If the line stops early, the effort isn't linked to anything on your MAP yet — the "Put this on your MAP" prompt is how you attach it.
- Momentum — this week's objectives done, a completion % per active GoalMAP, your daily Book-end streak 🔥, and (once you're logging wins) your 🏆 win-rate and ⚡ best win streak.
- Your to-do list — your focus shortlist, kept to five open items. Tap to tick items off (they show under that week on your desktop Week view), add new ones, or delete them. The full holding list is the 🧠 Brain Dump (on desktop, Build ▾) — promote your next five targets from there.
- ↕ Promote, demote, defer. The daily screen is a two-way board: tap ⋯ on an effort to send it ↓ to your to-do list or → to tomorrow, and tap ↑ on a to-do — or on an objective in Coming up — to promote it up into an effort slot. Reshape the day without leaving the screen. The first time, a one-tap tip explains the controls.
- ✉ Email this list to me — sends your focus + to-do list to your inbox, so you can work from it anywhere.
- Your focus leads. The screen is deliberately ordered so the first thing you see is today's (or this week's) focus — pick up the phone, see the next step, take it. Everything else — ☀ Daily Book-end, 🛢 Build your Drum Line, ✓ Weekly Debrief, 🎯 Line of Sight (every goal & the next objective toward it — the glance that answers "what's this all driving at?") and 🗺 View plan — lives in a Reviews & plan section at the bottom of the screen. The two review links there now take you to the 📋 Review tab on the right cadence rather than opening a pop-up. (Building and editing the MAP itself is best done on a computer.) A ⟳ refresh button sits in the header — tap it any time to pull the latest data.

🗺 View plan — your RoadMAP & GoalMAPs
Tap 🗺 View plan → on the Execute screen for the full list — each pillar with its next few objectives and dates, plus your focus banner (North Star + pillar missions) up top. Tap 🦾 Execute — today's focus at the top to jump straight back.
- Horizon switcher — Past · Week · Mth · Qtr · Yr · 3 Yr changes how far ahead the list looks (Past shows the last 30 days; Mth shows the next 30). If a pillar has nothing in the window, it shows its next item greyed, so there's always a next step in view.
- + Add — add an objective straight into a pillar, with the same loose dates (
Q3 2026,Mar 2027). - GoalMAPs appear collapsed — tap a heading to expand it.

13 · Coach link
Your MAP works on its own — but you can also link it to Ben so he can build and review it alongside you (and see your Weekly Debriefs). In the bar at the top:
- Click Link to Ben.
- Check your name (it's pre-filled so Ben knows which MAP is yours) and click Link to Ben again.
That's it — no codes to copy. Once linked, Ben can switch into your MAP to help build it. You stay in full control of your own account. The bar then disappears — it's done its job, and it won't ask again next time you sign in.

14 · Tips & FAQ
Do I need to save?
No. Everything saves automatically as you work. The only "Save" button is in the Weekly Debrief, which also emails your copy.
Goal vs dot — what's the difference?
They're the same objective shown at different horizon levels. Far out it's a goal diamond (); up close it becomes a dot (). You don't set this — the horizon decides.
My dates aren't exact yet.
That's fine — type a year, quarter or month and the app snaps it to a sensible date you can refine later.
I didn't get my sign-in email.
Check your spam / junk folder first (search for "Win the Day" or the sender address). Some corporate inboxes quarantine it, so a personal address (e.g. Gmail) is the most reliable for signing in. The link works on any device.
Why didn't my Weekly Debrief email arrive?
Your debrief still saved. Check spam, and confirm the Email to address is right. If it keeps happening, let your coach know.
It looks cramped on my screen.
The layout uses the full width of your browser — widen the window or zoom out (Ctrl/⌘ −) for more room.
The app says my trial has ended / everything is read-only.
After 30 days, the app switches to read-only mode so you can still view and export your plan but not edit it. Your data is safe — nothing is deleted. To carry on, use Keep MAP Matrix → in the banner to resubscribe, or 💬 Chat with Ben; ⬇ Export my data downloads everything any time. A couple of things stay usable even when locked: the 🎖 Comeback Protocol wizard (yours forever) and the ▶ 10×10 Bootcamp if you added it ($17, one year).
Can I download my own data?
Yes — your data is yours, two ways, both always available (even after a trial ends) from the Help ▾ menu or the trial-ended banner:
- 📄 Export plan (PDF) — a clean, printable document of your RoadMAP & GoalMAPs: each pillar's objectives in date order with their tier, what's done, and your North Star. Opens your browser's print dialog — choose Save as PDF. Great to print, share, or take to a session.
- ⬇ Export my data — everything on your account (every plan, objective, block, dependency, Weekly Debrief and to-do) as a single JSON file for safekeeping.
Questions or something not working? Contact your coach.